Hanging the Alexander Arrangement of Elements
Chemical Element System Model
Hanging is fairly simple,
and completely adjustable.
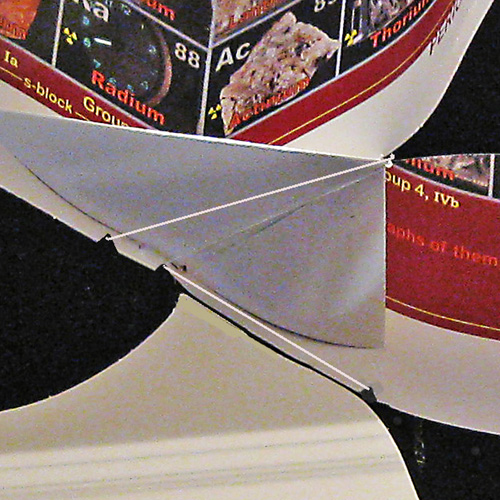
Make two small vee-notches in bottom edge of the model under Group 2, one by the intersection and another a half inch to the left.
Make another vee-notch in bottom edge of the d-block under the center of Group 4.
Make a loop at each end of about 12' of dental floss or other light, less visible line.
This will result in approximately 20" clearance above the model.
To reduce that by 3", use a foot less.
To increase that by 3", allow a foot more line.
Hook a large paperclip or other hook of your choice in the loops at both ends of the line.
Bring one end from the bottom up through the f-block and the other up through the d-block.
Grasp the middle of the line and bring up through the s- & p-block section at the intersection and place another paperclip there – leaving the line run loose.
Lift the model by the three paperclips together.
Guide the line from the d-block through the notch there and to the notch at the s-block nearest the intersection.
Guide the line from the f-block through the other notch under the s-block.
Level or tilt as you wish by tapping under a corner you want to raise, either now or after hanging.
When tapping, do not permit line to come out of the notches.
If all three paperclips are hung from the same place there will be some rotation, with breeze.
If a fixed position is desired, hang one of the hooks from a different location.
Hanging with a base attached is a little trickier. What? You didn't know about the base? Look there.

< BACK
AlexanderDESIGN
4851 N. Washtenaw Ave., Chicago, IL 60645 773.271.0318
last update 9/9/18